How to activate an account and set up the plugin?
Setup an account
Create an account with ScreenApp and contact admin@screenapp.io to activate a trial or your admin account
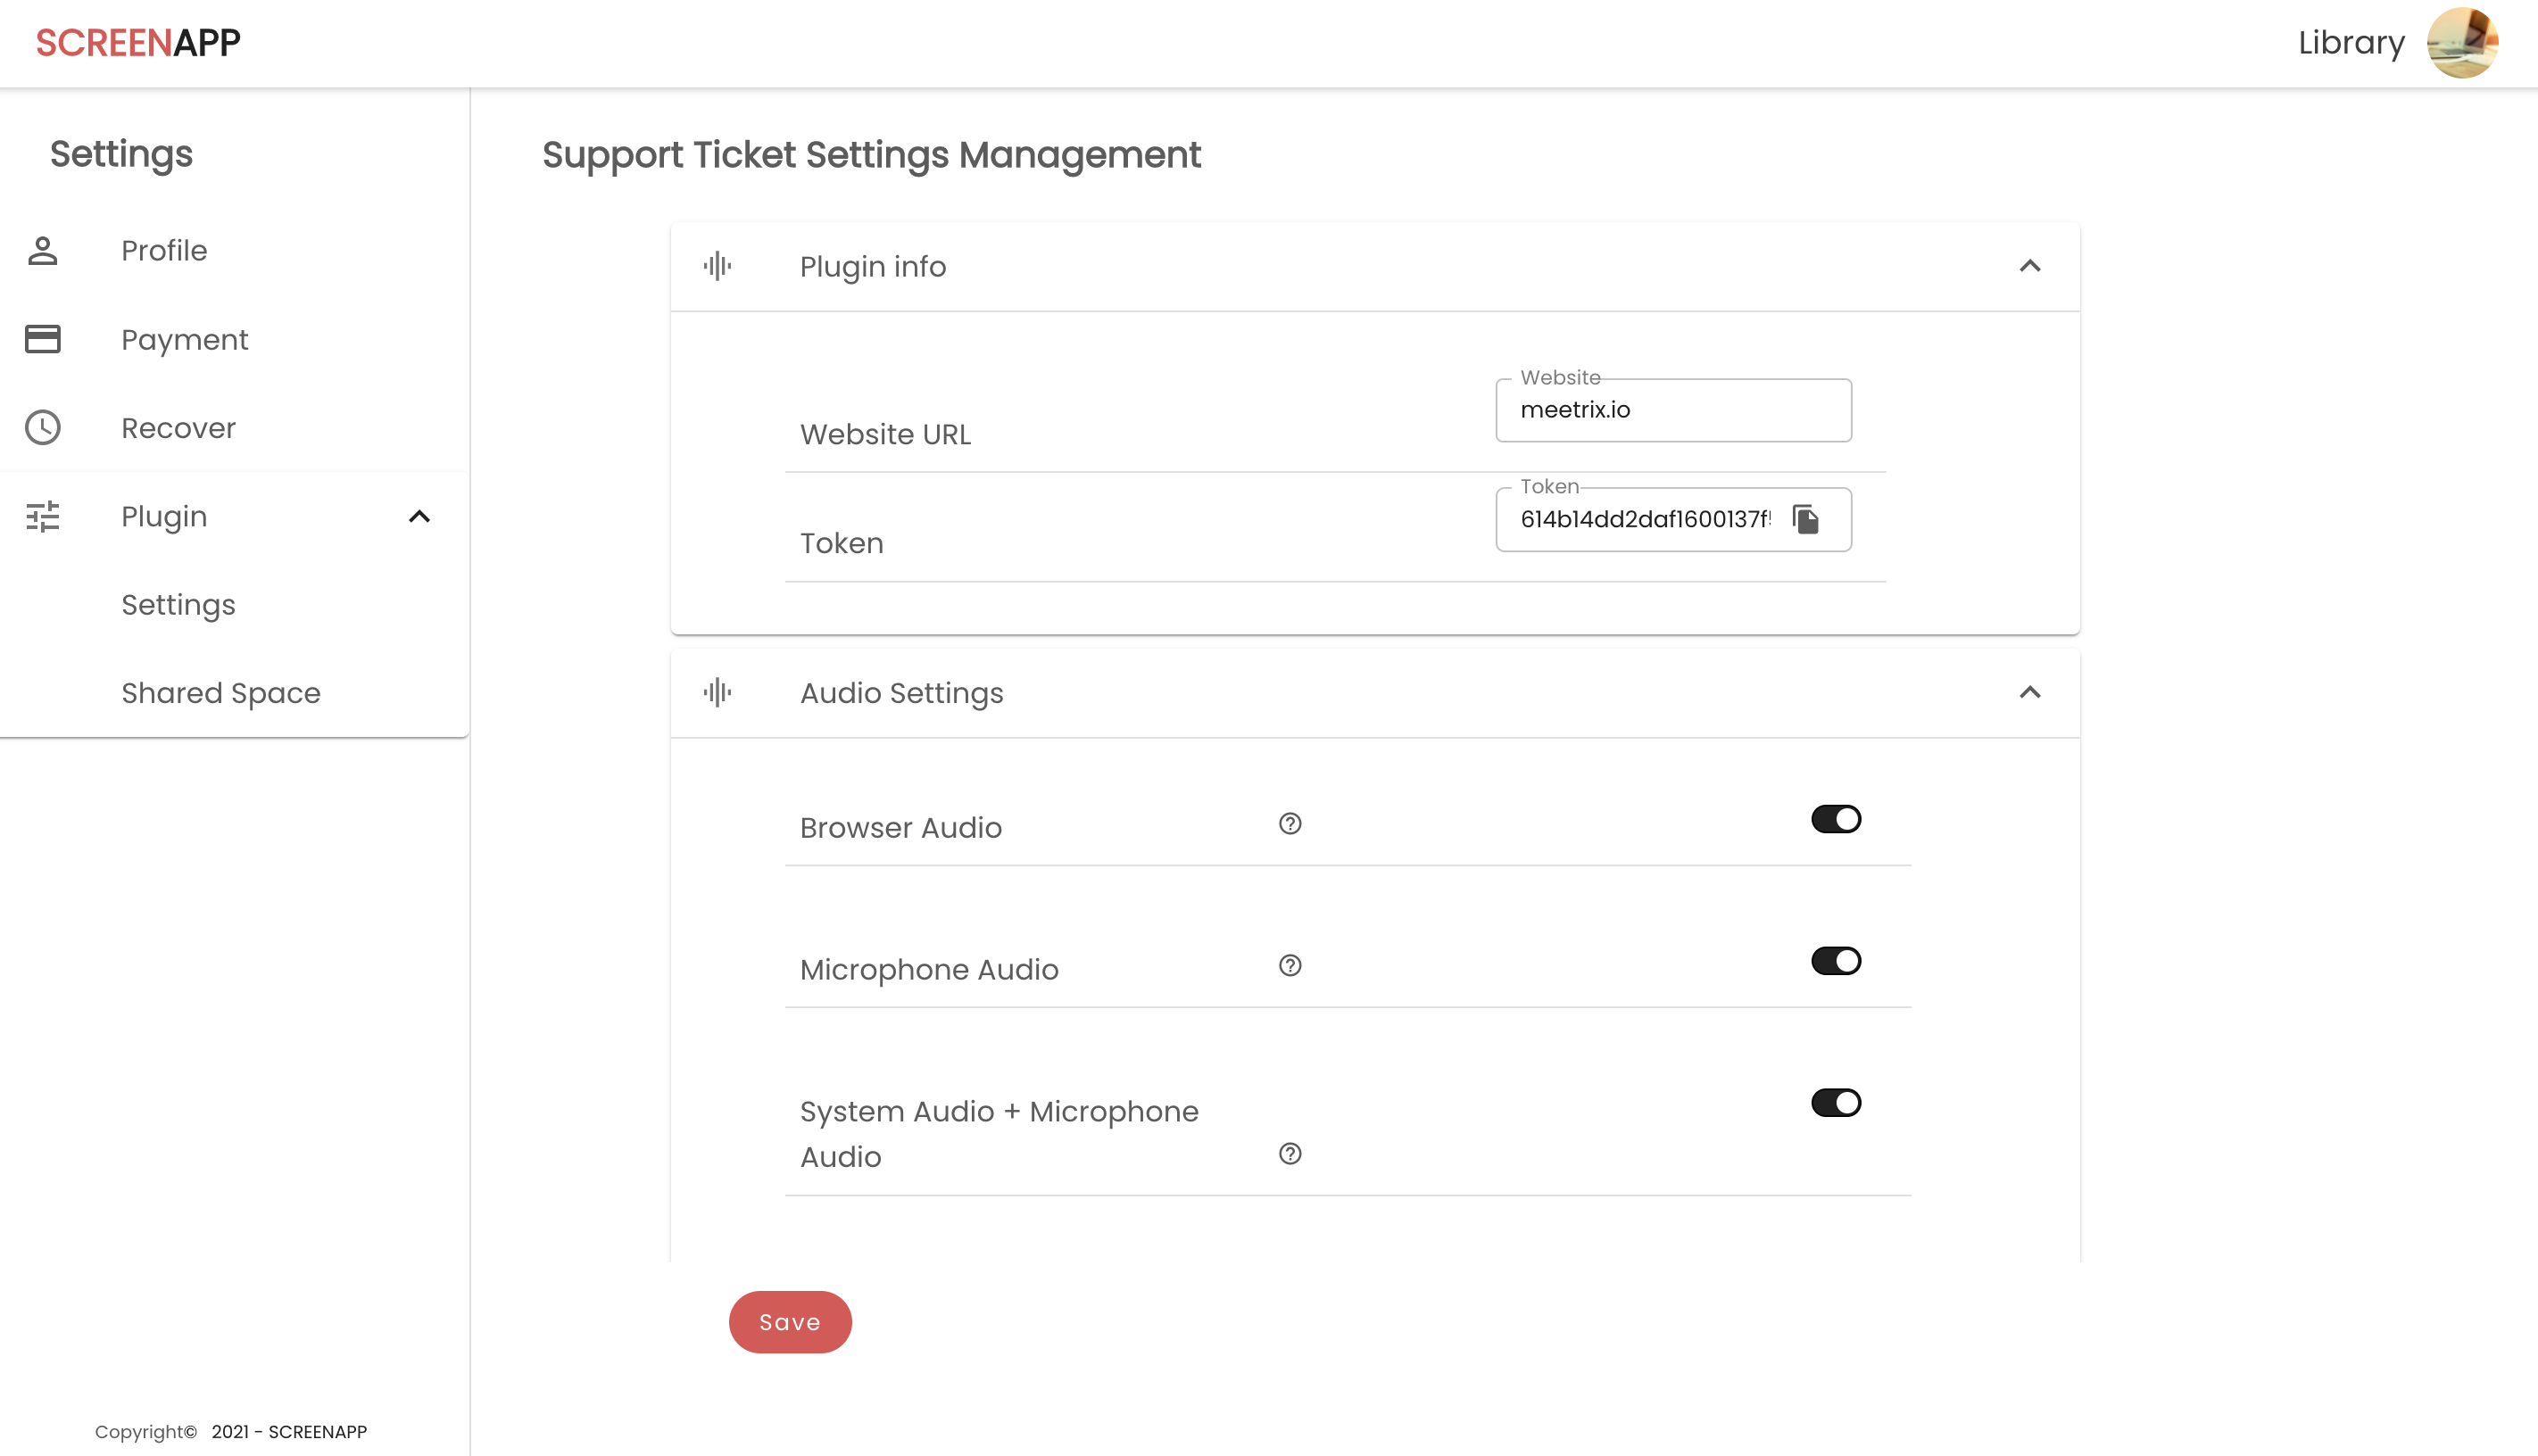
Get the token
Once you get your trial or admin account activated, enter your website URL and generate a token as given below.
Go to settings » Plugin » Get the token
Follow the instructions in the developer guide and integrate the ScreenApp recording plugin
Read the instructions of the developer guide and follow them to integrate the ScreenApp recording plugin into your website.
Developer Guide
- Import the following JS in the script tag
https://screenapp.io/plugin-4.11.0.bundle.js
Example:
<script src="https://screenapp.io/plugin-4.11.0.bundle.js" type="text/javascript"></script>
- Create a parent element with a unique Id
Example:
<div id="recordButtonContainer"></div>
- Call the following function on your recording button
const screenApp = new window.ScreenApp(token, finishRecordingCallback);
screenApp.mount(parentElementID);
The Plugin object constructor uses the following options:
-
token: Plugin token generated by the screenApp
-
finishRecordingCallback: This will trigger when the to proceed button which is in the plugin window is pressed and the following recording information will be returned
-
Id: recording ID
-
URL: recorded file URL
-
-
Example
const loadPlugin = (finishRecordingCallback) => {
  const screenApp = new window.ScreenApp('60548673793cf30013627df0',finishRecordingCallback);
  screenApp.mount('#recordButtonContainer');
};
const [videoLink, setVideoLink] = useState('');

<button onClick={() => loadPlugin(({ url }) => setVideoLink(url))}>Start recording</button>

<input type=”text” value={videoLink} onChange={(e) => setVideoLink(e.target.value)}/>
After integrating ScreenApp plugin into your website or application, you might need to update the URL of the script when there is a new version.
How to change user recording settings?
Once you are done with the integration, you can change the recording settings, interface and permissions available to your website users through the Settings section.
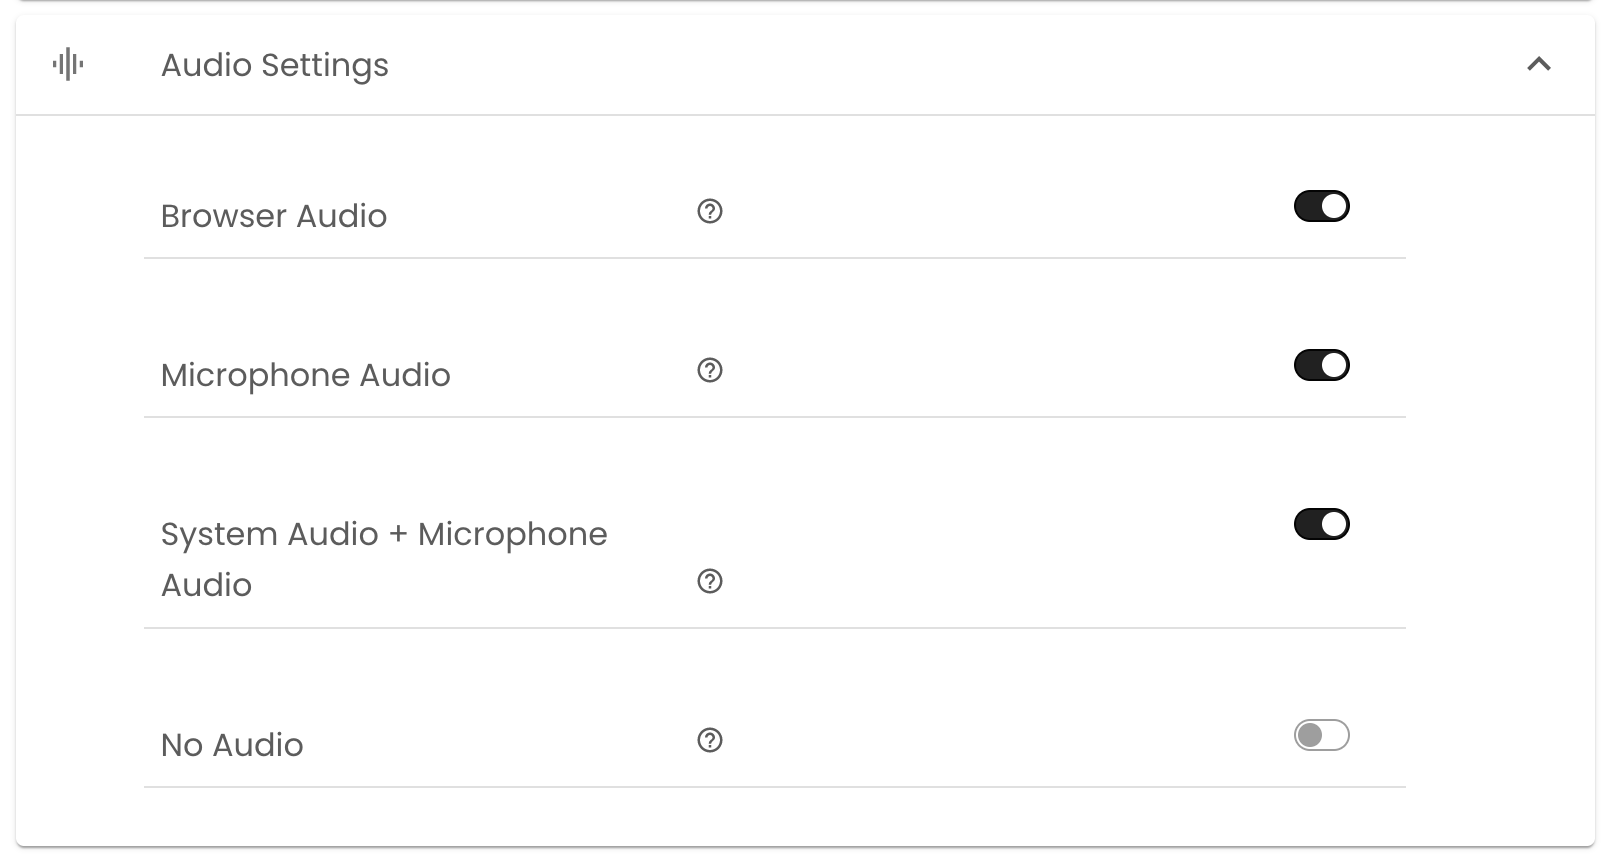
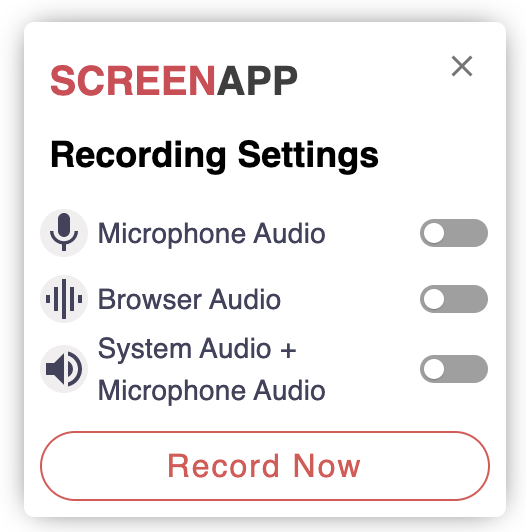
Audio recording settings
The admin can select the audio recording options that should be available to the website users.
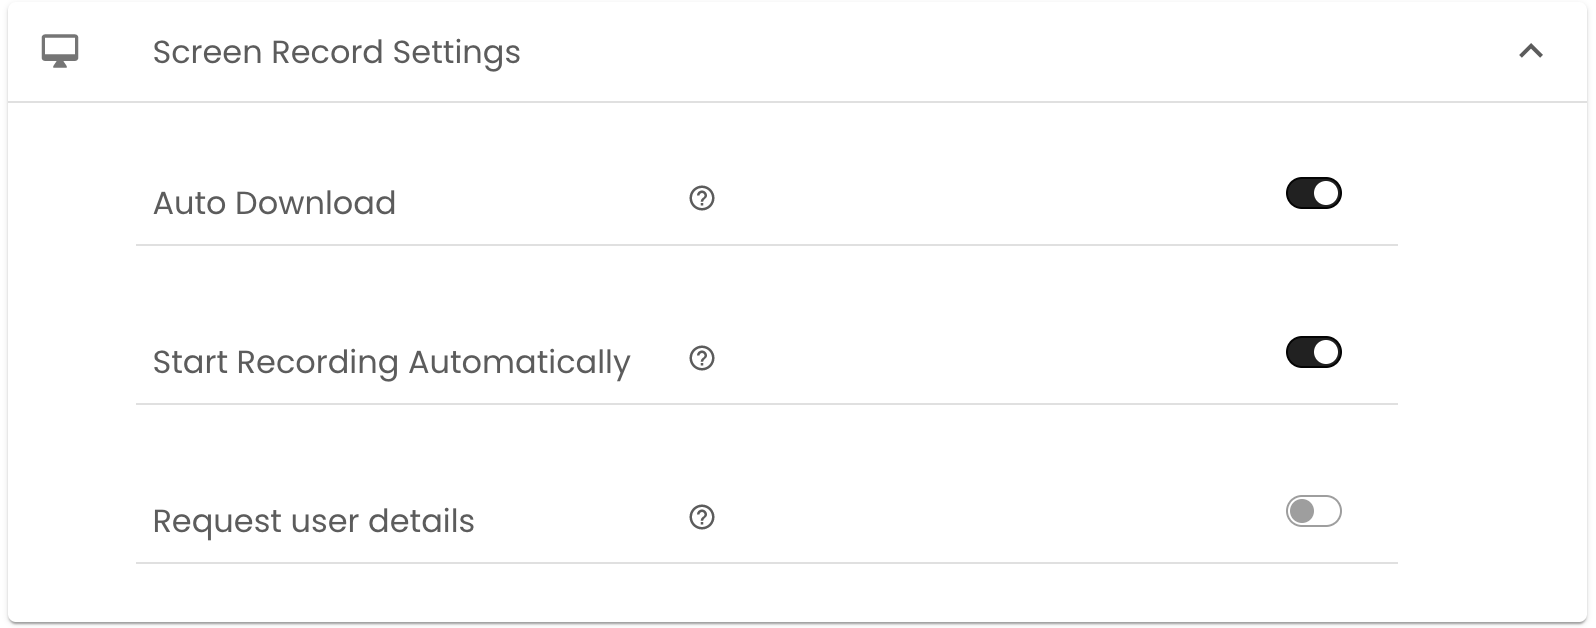
Screen recording settings
The admin can enable or disable the following screen recording options.
Download a copy of the recording.
Start recording automatically after the selection of the preferred recording mode
Request user information (name and email) before recording.
Other settings
-
Hide ScreenApp logo from application
-
Change the text on the recording button

Change the recording button text
The admin input text displayed on the actual recording button
-
Choose whether the screen recorder should be positioned on the left or right side of the screen.
-
Choose the preferred recording length for users. The maximum allowed per recording is 60 minutes.
Refer: ScreenApp Recording Plugin Architecture for more technical details