How to Record a Microsoft Teams Meeting with ScreenApp
Recording a teams meetings can be a real hassle, especially if you haven’t been granted admin rights to a meeting. With ScreenApp, recording a Teams meeting is almost as easy as joining a meeting. Regardless of whether you launch your meeting on your web browser or Microsoft Teams app, ScreenApp allows you to record your Teams meeting conveniently. Aside from that, ScreenApp also enables you to capture both your system and microphone audio, so you can record your voice as well as the voice of the other participants of the meeting.
Follow along as we take you through a step-by-step process on how you can record your Teams meeting with audio using ScreenApp in just a couple of steps.
Step 1
Host or join a Teams meeting through your web browser or Teams app. No matter whether you use Windows, Apple Mac/ iOS or Linux / Ubuntu, ScreenApp works on all operating systems
Step 2
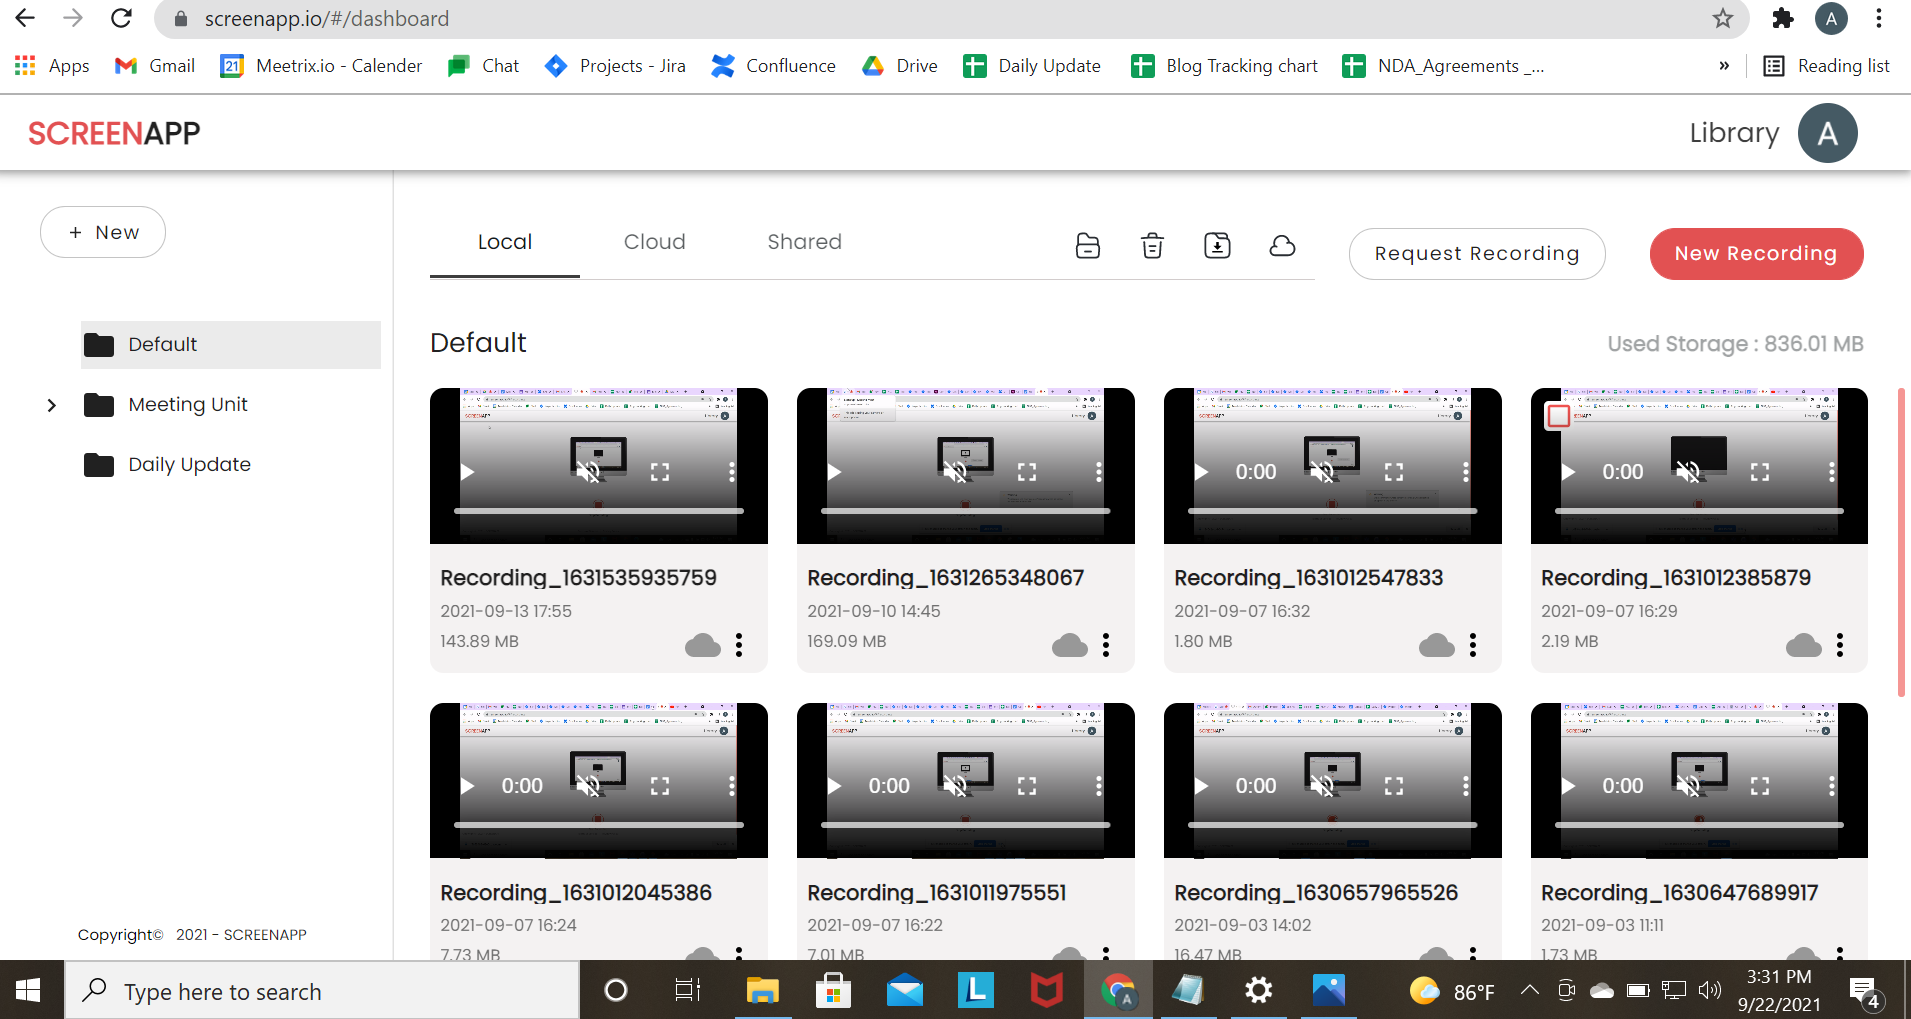
Sign in to your ScreenApp account and click New Recording at the top right-hand corner of the dashboard.
Step 3
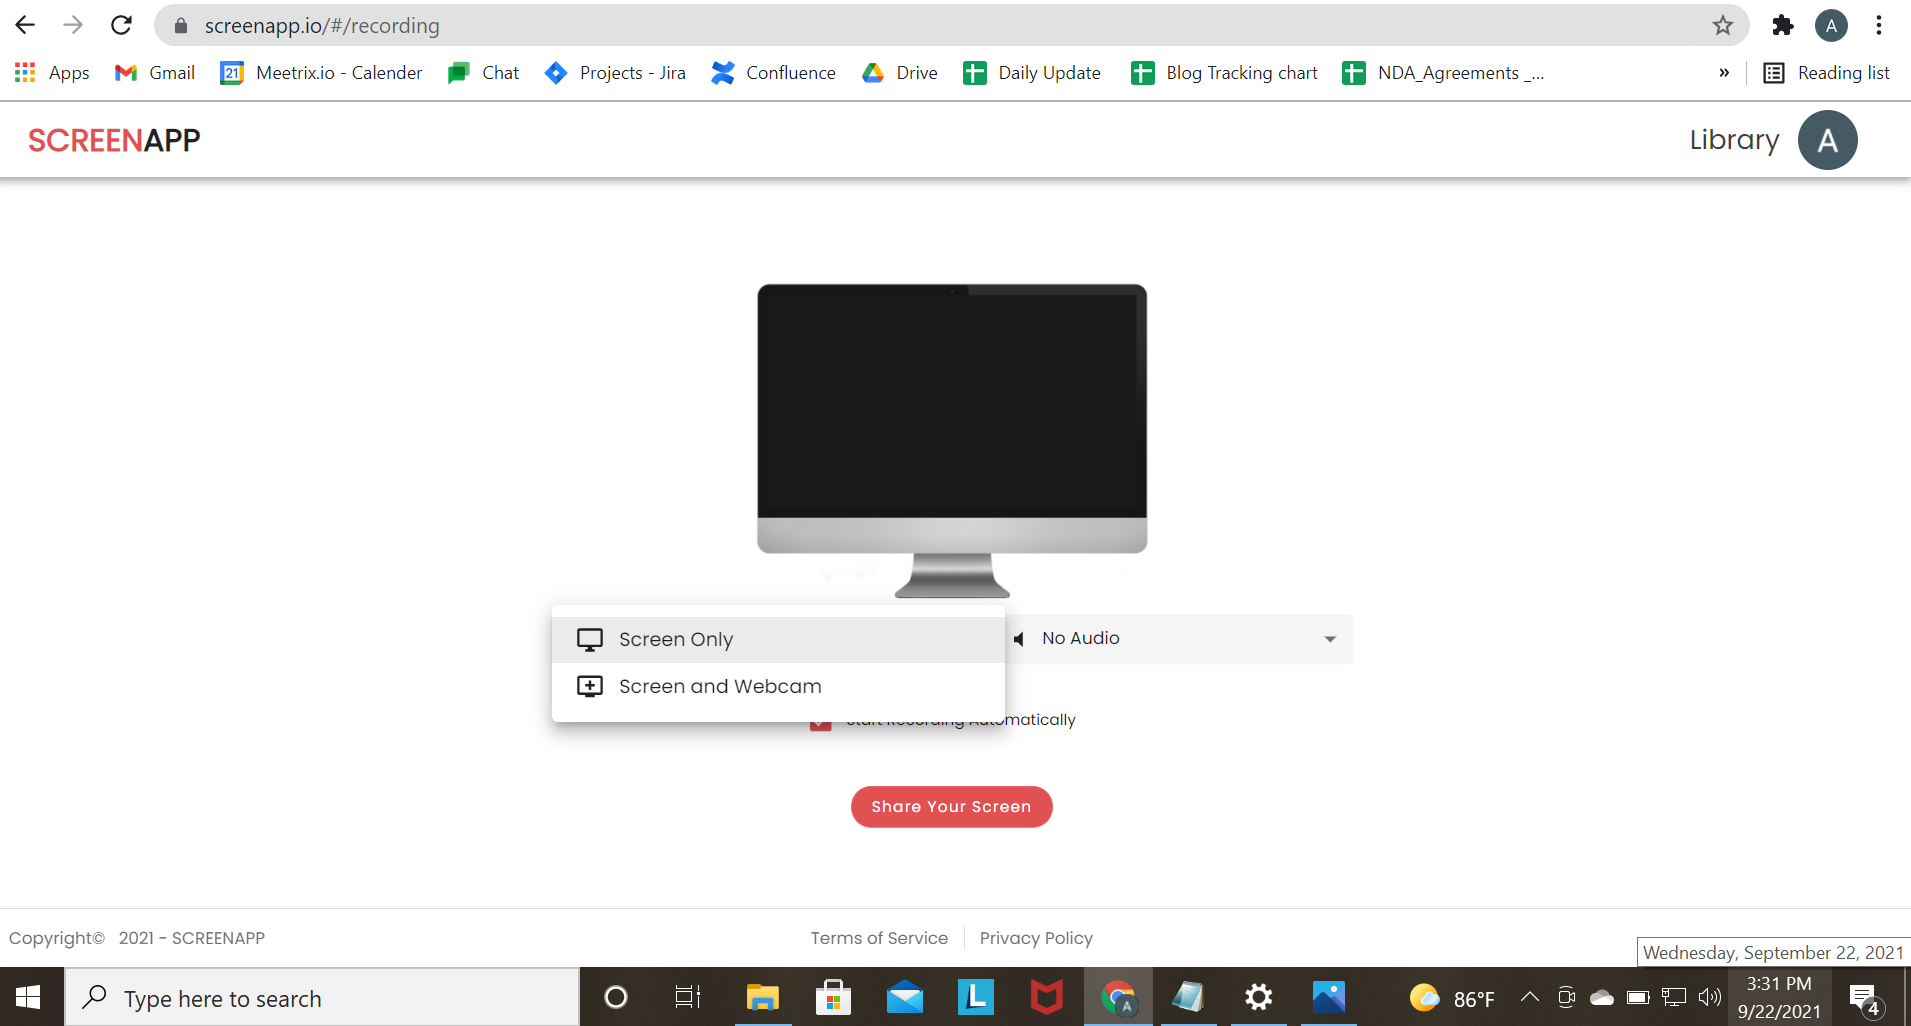
Select one of the below screen recording options from the first drop-down menu.
-
Screen Only
-
Screen and Webcam
Step 4
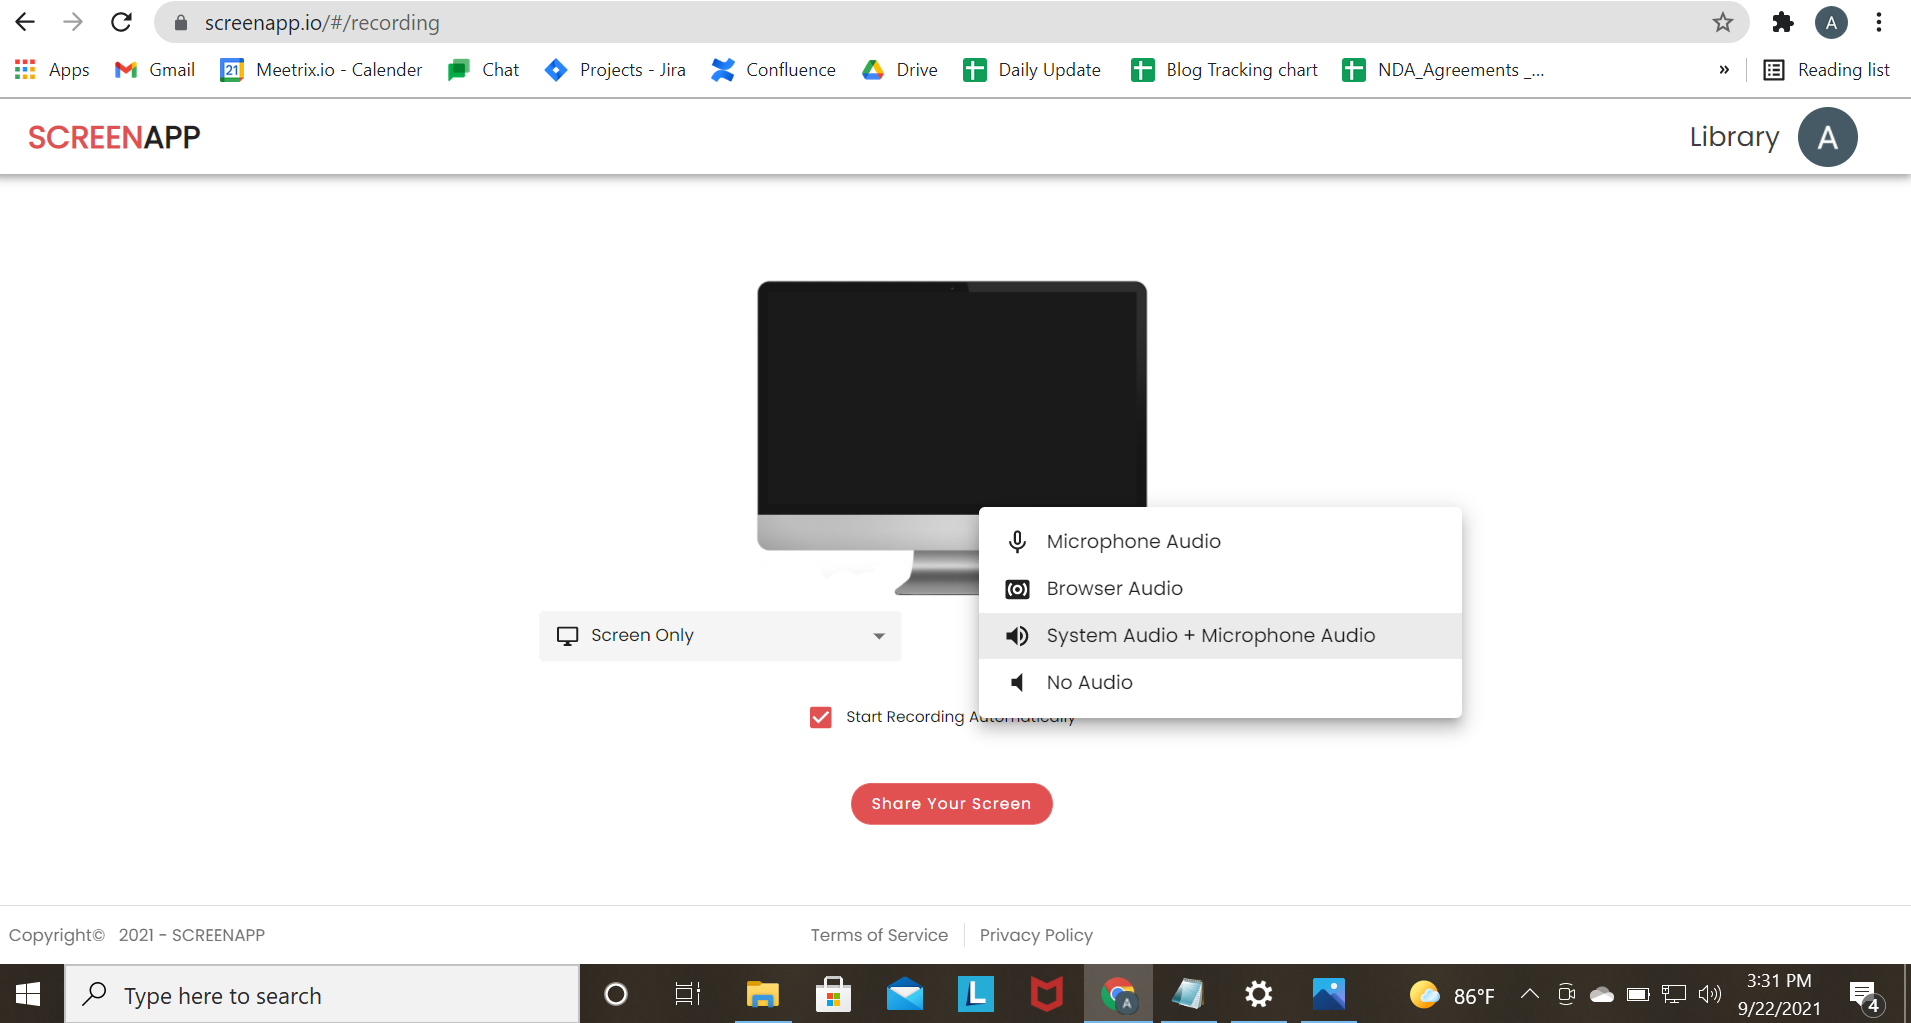
Select System Audio + Microphone Audio to record your voice as well as the voice of the other participants of the meeting.
Step 5
Hit the Share Your Screen button.
Step 6
If you are launching/joining your Teams meeting on the Teams app, go to the Window tab, select Teams Meeting and hit Share. The other option is to select the entire screen, which is also the recommended option.

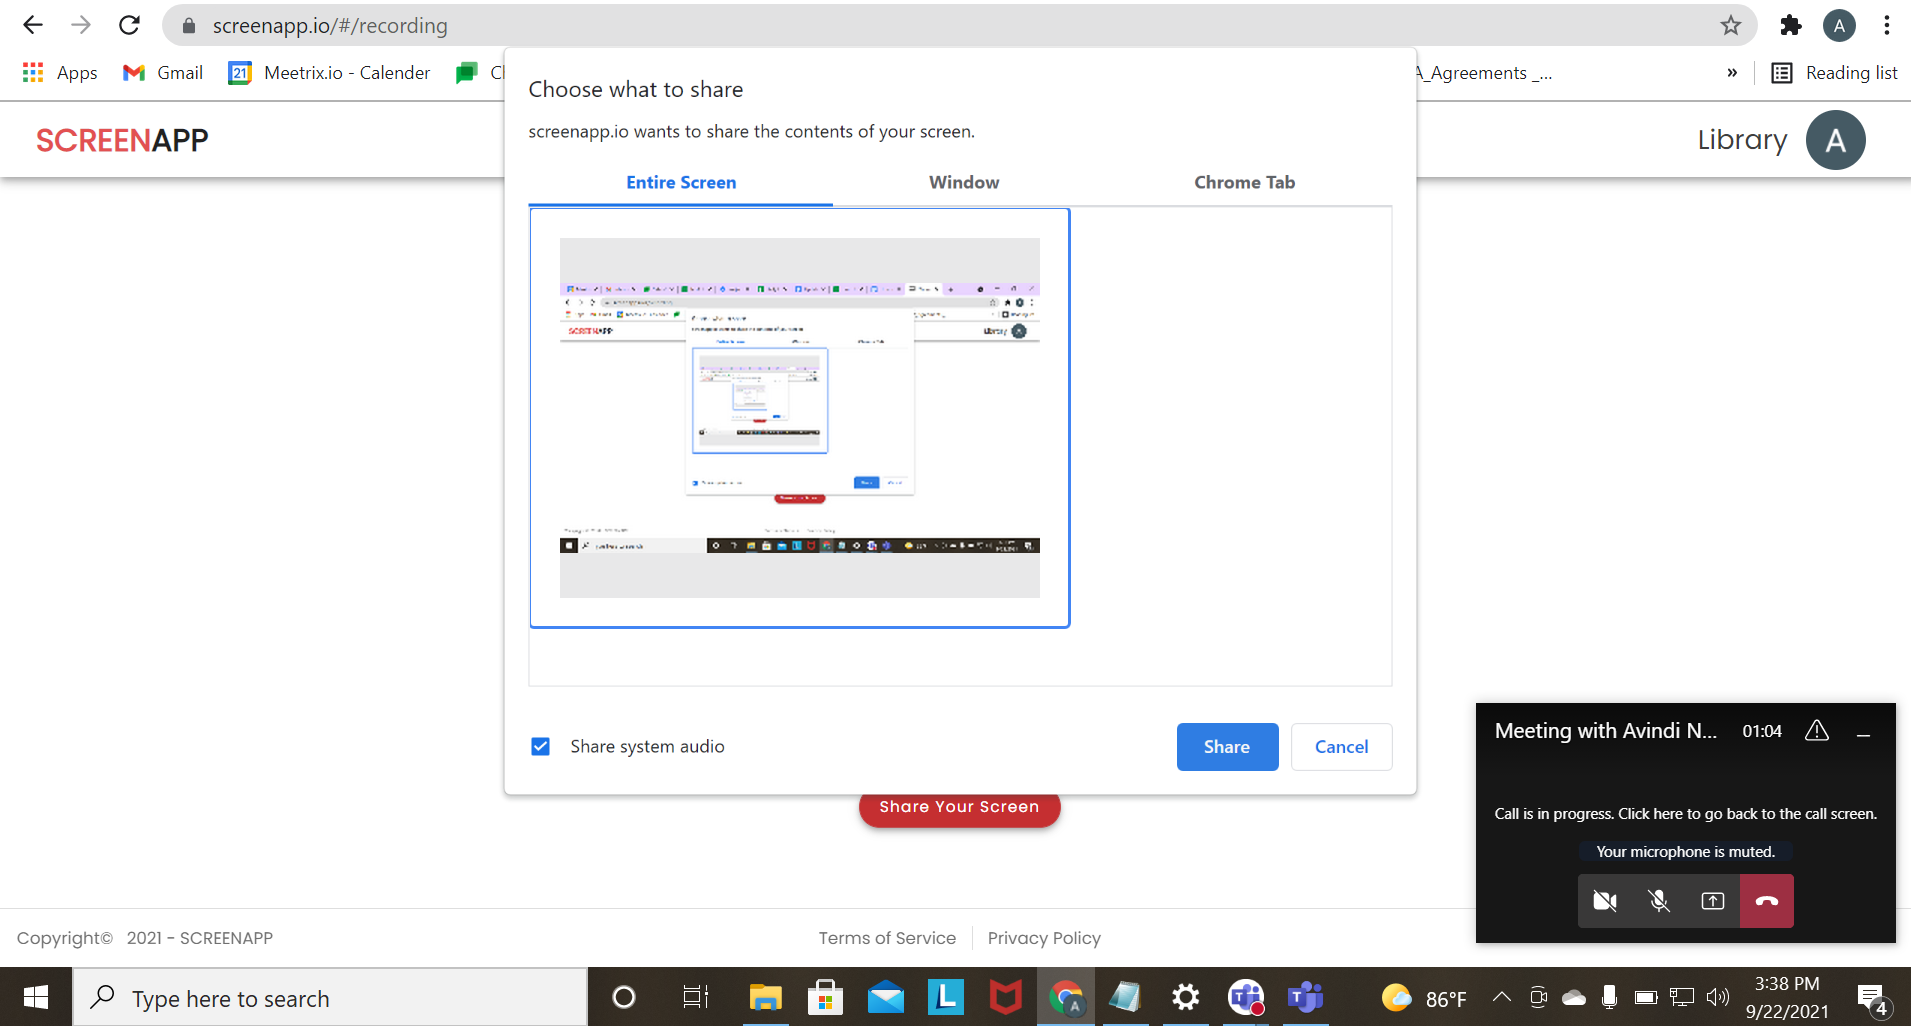
If you are launching/joining your Teams meeting on your web browser, go to the Browser Tab (Chrome Tab), select the Teams Meeting tab. The other option is to select the entire screen, which is also the recommended option.

Step 7
Select the Share System Audio checkbox in order to successfully record your system audio and hit Share.
Note : Please note that Mac users won’t be able to see this option under the entire screen selection as it is selected by default.
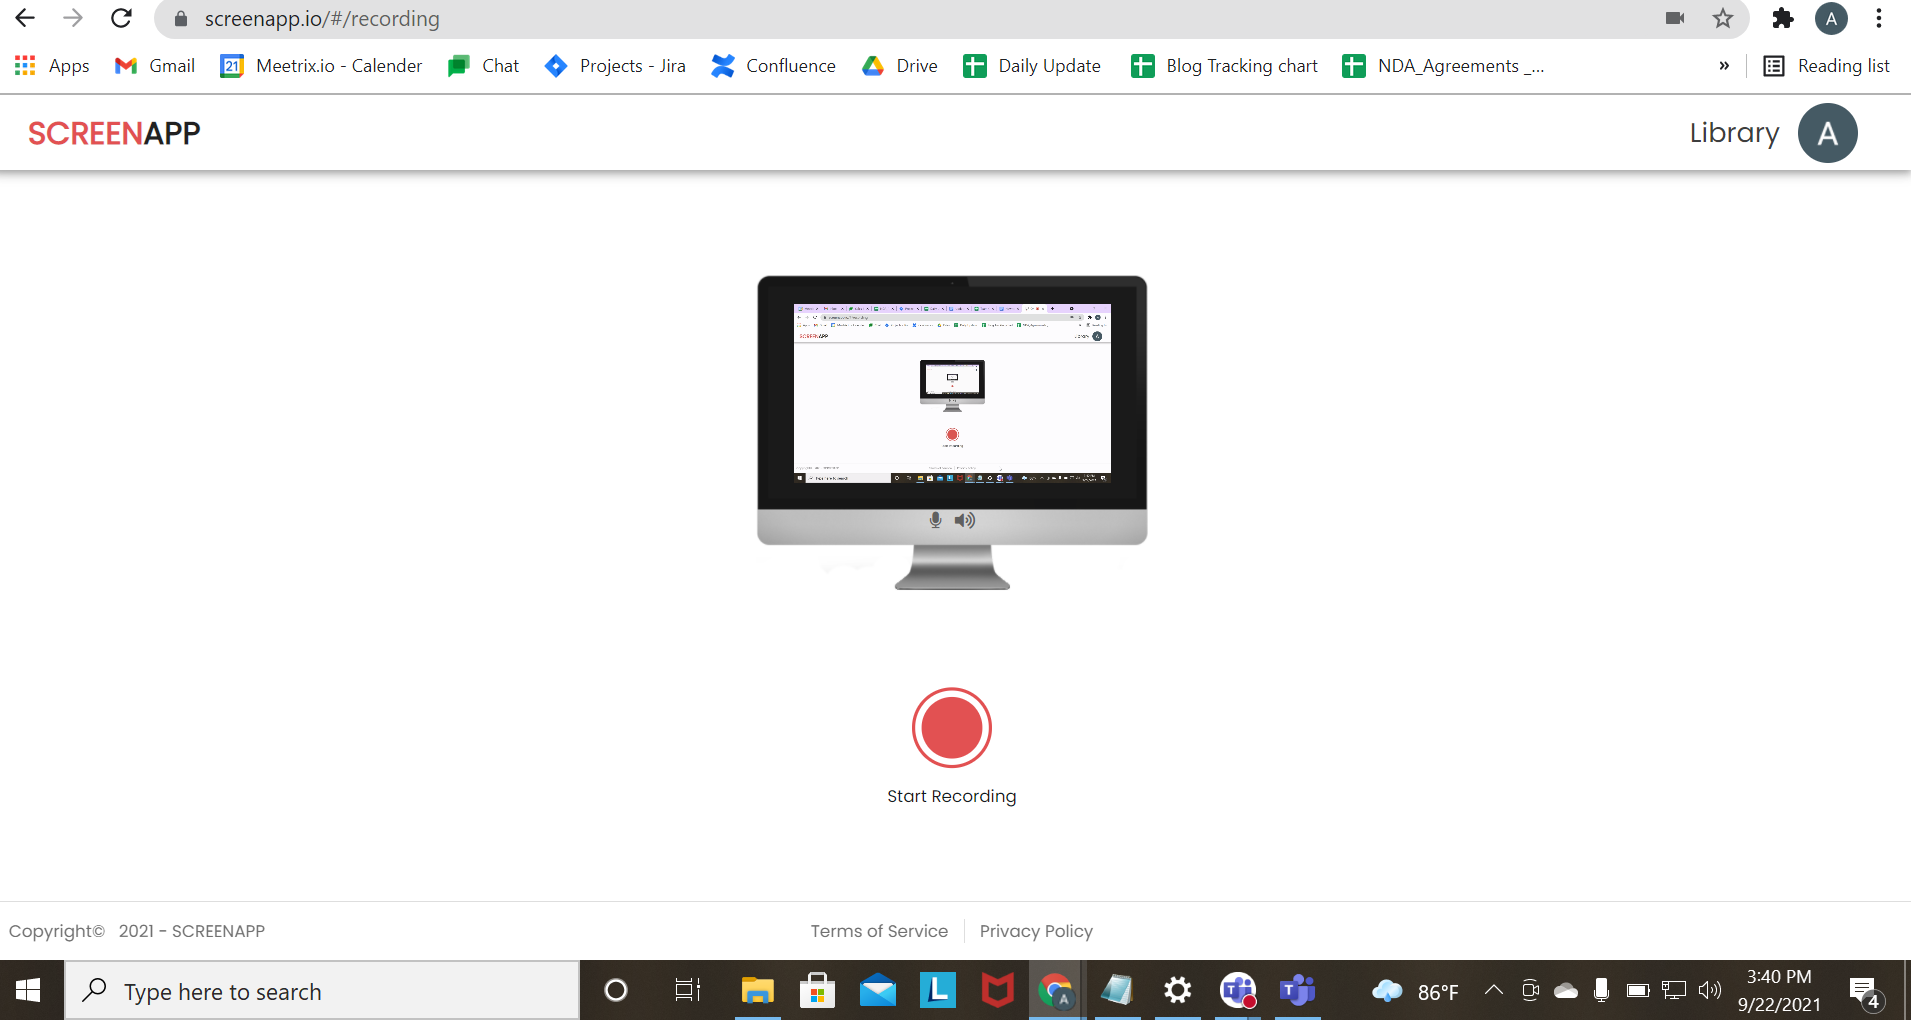
Step 8
Select Start Recording to begin recording your meeting.
Step 9
Once you are done recording, end the Teams meeting and hit Stop Recording on ScreenApp to end the recording.
Involving such a few steps, you can record your Teams meeting using ScreenApp.
Benefits of Using ScreenApp to Record Microsoft Teams Meetings
You can enjoy a wide array of benefits by using ScreenApp to record your Teams meetings.
-
Record with or without the permission of the host - The in-built meeting recording option of Microsoft Teams provides recording privileges only to the host of the meeting. With the use of ScreenApp, you can record your Teams meetings with or without the host’s permission.
-
Record lectures and classes - If you are using Teams to participate in online lectures or classes, ScreenApp is a great way to record your lessons. This can be extremely helpful for future references when you are conducting your studies.
-
Record business meetings and conferences - Microsoft Teams is widely used in the commercial sector for video calling and conferencing. ScreenApp can help you record those meetings so that you can easily refer to what was discussed in a particular meeting.
If you love ScreenApp and believe that it makes your life much easier, we would love you to share us with your friends on Facebook and LinkedIn.
Feel free to write to us for any information, queries, and comments about ScreenApp at support@screenapp.io.